 DesktopPane
Menu bar utility for big monitors
One monitor. Three displays.
macOS gives every display one full screen app, or two in Split View, whether the display is a 13-inch laptop or a 6K monitor. DesktopPane splits a 5K or 6K screen into two or three real displays, so each part gets its own full screen apps, Spaces and menu bar.
The productivity part
More full screen apps per screen
Full screen is the best way to focus on an app: no window edges, no Dock, nothing to arrange. But macOS still counts full screen per display, and a display is whatever is plugged in. On a 5120 × 2160 or 6016 × 3384 monitor, that means one app stretched across far more room than it needs. Because each pane is a real display, the limit now applies to each pane instead of the whole monitor.
macOS on its own
1–2
full screen apps per monitor
One app, or two side by side in Split View, on all 5K of the screen.
DesktopPane · 2 panes
2–4
full screen apps at once
One app per pane, or Split View in each pane for four apps.
DesktopPane · 3 panes
3–6
full screen apps at once
Three apps side by side, up to six with Split View, if each pane is wide enough for two.
Not window tiling
Real displays to macOS
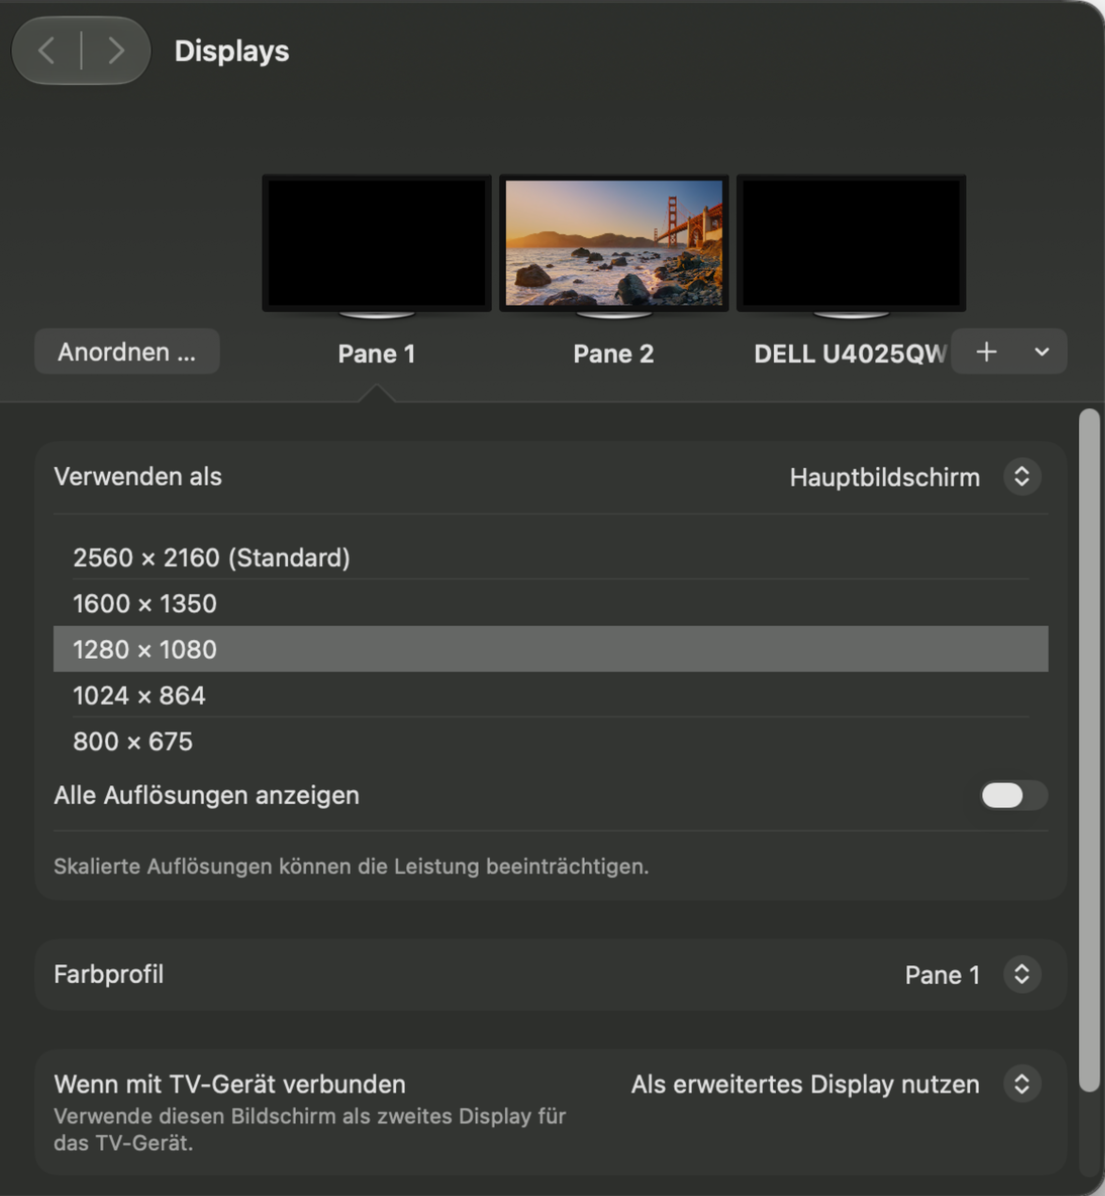
Window managers draw zones and push windows into them. DesktopPane does something else: it adds virtual displays to macOS, one per pane, and shows them side by side on your monitor. To macOS each pane is just another monitor, so it works with everything that understands monitors.
- Native full screen with the green button or
⌃⌘F, inside one pane. - Spaces per pane, with its own Mission Control row and menu bar.
- Resolutions per pane: native 1:1 pixels or sharp Retina 2×.
- Windows remember which pane they belong to, across restarts.
Settings
Drag the split where you want it
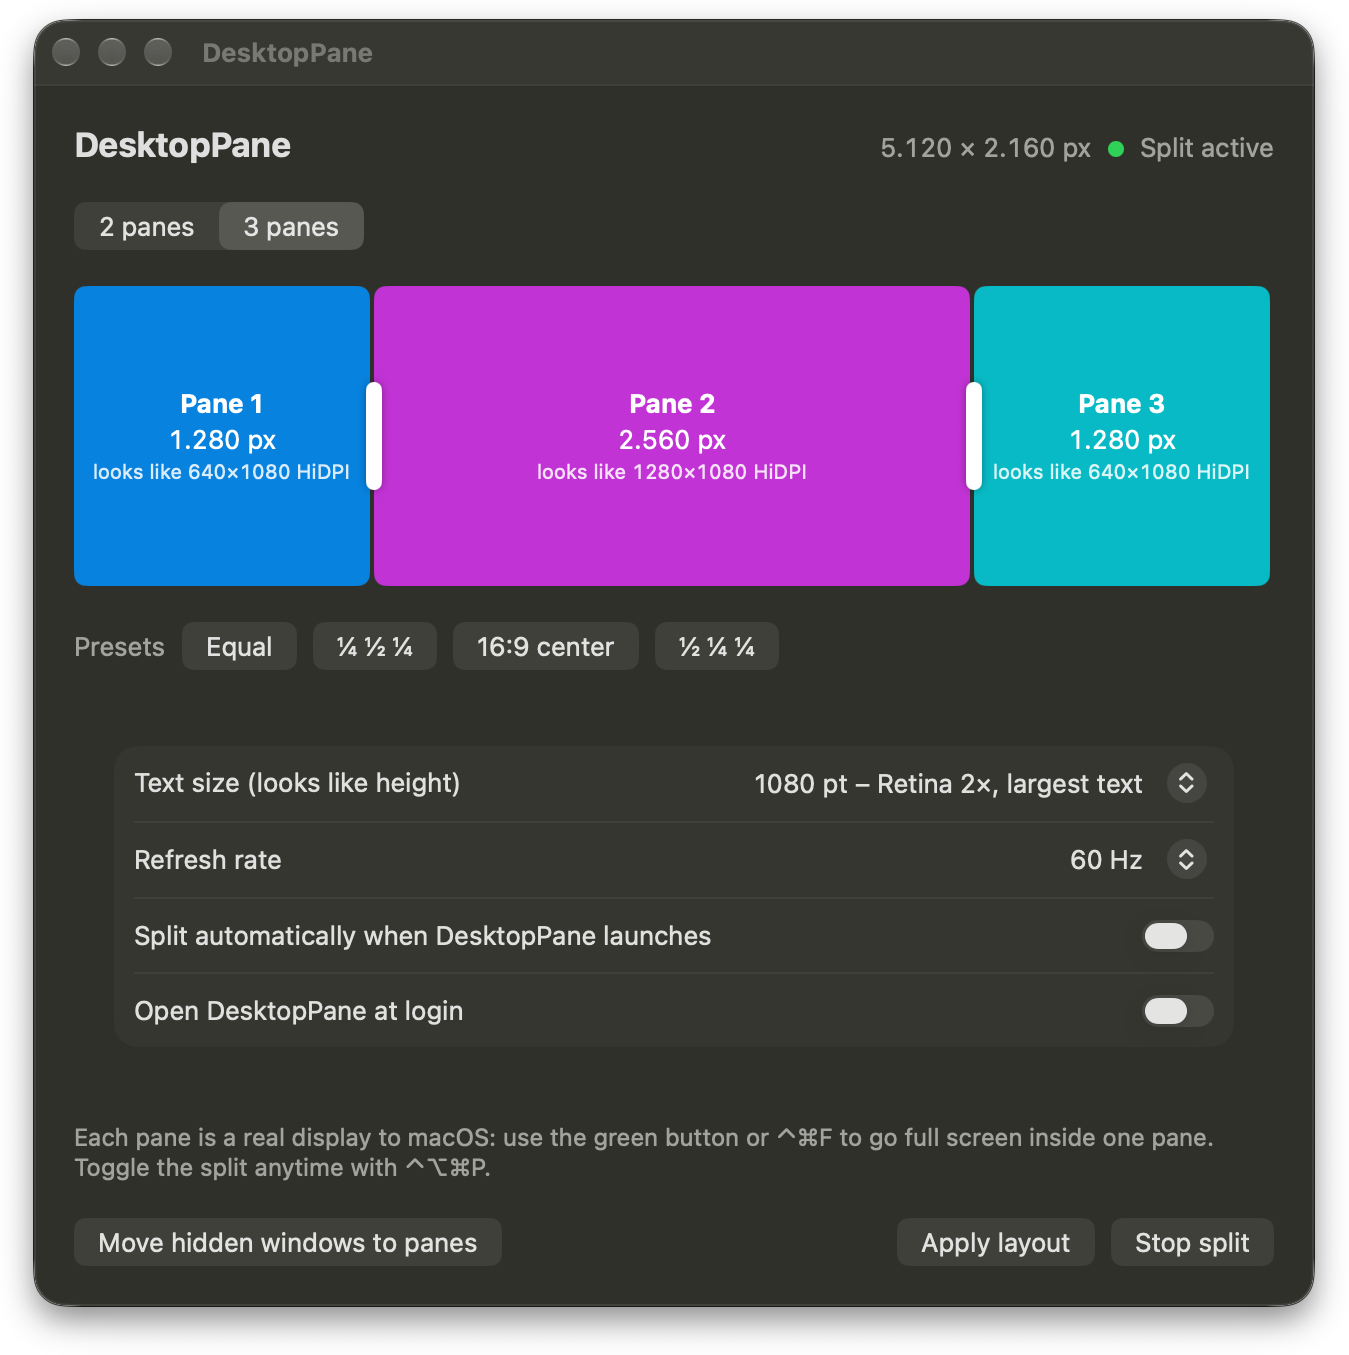
Pick two or three panes and drag the dividers. Pane widths snap to clean pixel values, and every change applies live. Your windows stay on their panes.
- Presets: equal, ¼ ½ ¼, ½ ¼ ¼, and 16:9 center, a true 3840 × 2160 pane in the middle of a 5K2K monitor.
- Text size: same as the monitor, scaled, or Retina 2× for the largest, sharpest text.
- 60 or 120 Hz, matched to your monitor.
- ⌃⌥⌘P turns the split on and off from anywhere.
- Starts at login and splits right away, if you want it to.
Under the hood
How it works
Four parts, all running locally. Nothing is sent anywhere, and there is no account.
Reference
Specifications
- Panes
- 2 or 3, any widths from 640 px, snapped to 16 px
- Monitors
- Made for wide 5K and 6K monitors (5120 × 2160, 5120 × 1440, 6016 × 3384). Picks your widest external display.
- Text size
- Native 1:1, scaled, or Retina 2× (HiDPI) per pane
- Refresh
- 60 Hz panes, cursor at the monitor's rate, 120 Hz panes optional
- Shortcut
⌃⌥⌘Pturns the split on and off- Permissions
- Screen Recording, to show the panes. Accessibility only if you use “Move hidden windows to panes”.
- Privacy
- Everything stays on your Mac. No network access, no analytics, no account.
- Requires
- macOS 14 Sonoma or later, Apple silicon or Intel
Free download
Get DesktopPane
- Open the DMG and drag DesktopPane to Applications. Open it. It lives in the menu bar.
- Click Start split. macOS asks for Screen Recording: allow it in System Settings, then quit and reopen DesktopPane and click Start split again.
- Drag the dividers, or pick a preset, and click Apply layout.
- Make sure Displays have separate Spaces is on (System Settings › Desktop & Dock). It is on by default.
- Move an app into a pane and press ⌃⌘F. Repeat for every pane.
Good to know: macOS has no public interface for virtual displays,
so DesktopPane uses the same private one as other display tools. A future
macOS update could break it. If anything ever looks wrong, ⌃⌥⌘P
turns the split off, and quitting the app always gives you your normal
monitor back.